
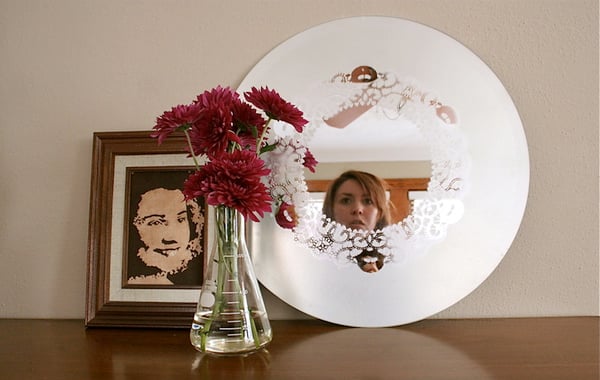
If you like the look of etched mirrors, but don’t have the budget for one right now, or you just want to create something custom for your home, try this mirror DIY!
With just a few supplies, you can create an etched mirror / frosted mirror in no time. Honestly, this project only has four materials (including the mirror)!
P.S. Even if you’re not a fan of the doily design that I created, there’s still something to learn here.
This frosted mirror technique can be used to create tons of interesting and unique designs. Click through to see what I mean.
Make an Etched Mirror in Minutes
Get the look of an etched mirror in minutes, without having to use heavy, expensive, and sometimes toxic creams.
I opted for a frosted glass spray paint that provides the same look, but takes way less time AND is more affordable.

Materials Needed for Frosted Glass Mirror
- round mirror (framed or unframed)
- paper doily
- frosted glass mirror spray
- Oboustranná páska

How to Make a Frosted Glass Mirror
1. Start my cleaning the mirror with soap and water to remove any debris or dirt, and let dry.
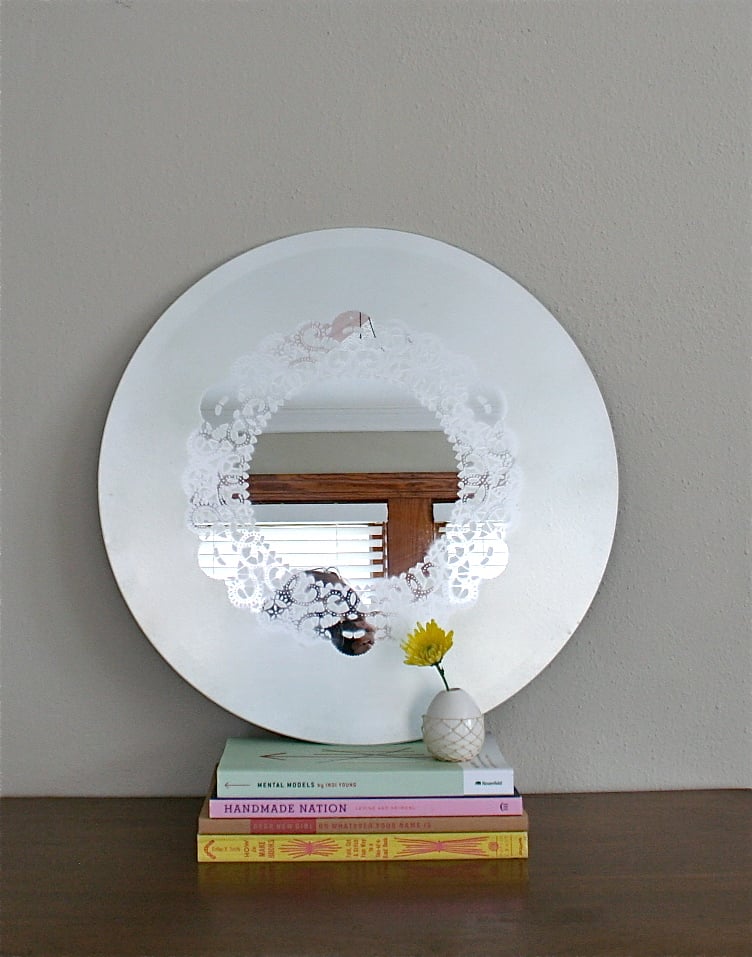
2. Choose a paper doily that works for the size mirror you have. My doily is about a third of the size of mirror.
On the backside of the doily, place double sided tape all over.
You will want to overload it with tape so that you can stop the spray from going into areas you don’t want it to be.
But you also want to be sure not to put tape over any areas that are suppose to be “open” in the doily.
Then turn over and secure to the mirror anywhere you wish.
Měj na paměti: The area you put the doily, will be the only spot in the mirror you will actually be able to see a reflection when we are done.
3. Place mirror down on flat surface.
Shake frosted glass spray according to directions and then spray 7-12 inches away from the mirror in even, sweeping strokes.
Thin layers are the best way to go about this to avoid drips and other inaccuracies.
Wait for each coat to dry (about 15-10 minutes) before applying the next coat. My mirror took four coats.
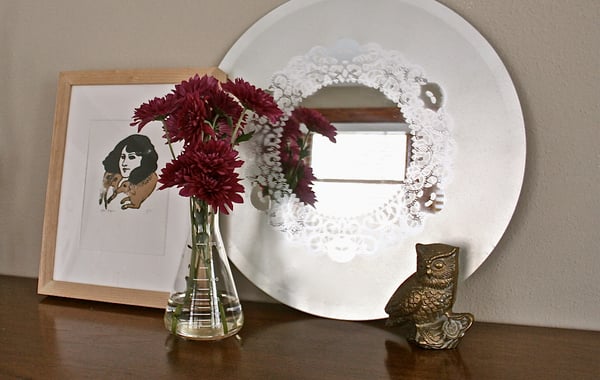
4. After the last layer is completely dry, gently remove the paper doily and double-sided tape from mirror.
Clean with damp cloth and you are ready to hang.

Now that you’ve seen how to make a frosted glass doily mirror, maybe you’d like to check out some more DIY mirror ideas?
This one below is my current favorite…
 How many times have you seen artwork at Goodwill that has a frame in good condition but the picture inside is ugly? Most get passed by for something more attractive. This month, my blogging friends from the At Home DIY Challenge are creating decor in under two hours. My DIY Frosted Mirror is a quick and inexpensive way to upcycle an old print into stylish home decor. I started with this old framed floral print that was in my stash.
  The print was in bad shape but the frame, while beat up, was sturdy and the glass was intact.
  The first step is to remove the print and glass from the frame. Turn the frame over to to see how it’s held in place.
  Mine had brad nails keeping it together. I pushed the nails up with a screwdriver so I could lift out the print and glass. It’s a good idea to wear gloves as the glass is very sharp!
  After you’ve removed the glass, clean it thoroughly with glass cleaner. Wipe down the frame, too. I either use Dixie Belle White Lightning, or a mixture of half rubbing alcohol & half water. Next, paint the cardboard backing with black paint. I just used a water based acrylic enamel that I had on hand. Discard the artwork (unless you want to keep it!). I just painted one coat and set it aside.
  Now it’s time to freshen up the frame. I used gold craft spray paint that I had in my stash.
  I sprayed one coat on the frame until it was evenly covered.
  I was so excited to use my new Wagner Spray Shelter!
  Finally I was ready to create the “frosty” looking mirror. To get this look, you’ll need a can of Mirror Effect spray paint by Rust-Oleum.
  To get the desired effect, you’ll need to apply three coats. The good news is that you only need to wait a minute between coats! I put the black painted cardboard under the glass so I could see the transformation.
  Once you’re done painting, it’s time to put everything back together. Put the glass in first with the mirror side facing down. Then put the painted cardboard on top, with the painted side facing down.
  Use needle nose pliers to secure the nails back in place.
  Flip it over and you’re done! This is not a mirror to check your hair and make-up before you leave the house. It’s just meant to give your decor a fun vintage vibe
  I hope you liked my DIY Frosted Mirror! Be sure to check out what my creative friends from the At Home DIY Challenge have been up to this month. Just click on the link below to view all of this month’s projects. Till next time! Rebecca See more 2-Hour DIY Projects


PODOBNÉ ČLÁNKY
Podobné příspěvky

DIY Leaf Placemats for Spring and Summer Tablescapes
By Rebecca Apr 12 Apr 20
If you follow my blog, you know that I love to set pretty tables. I’m always on the lookout for thrift store dishes, flatware, stemware, linens and other table accessories. Lately, I’ve seen tables set with faux leaf chargers and placemats, but I haven’t been able to find any on my treasure hunts. So, I…

Dough Bowl Centerpiece and Fall Tablescape
By Rebecca Sep 23 Sep 25
A Fall tablescape that features a rustic dough bowl centerpiece filled with moss, maple leaves and pumpkins provides the perfect setting for a cozy Autumn meal. I’m thrilled to be participating in the Celebrate Fall Home Tours, hosted by Leen from Sand Dollar Lane. 23 talented bloggers are sharing spaces in their homes decorated for…
Chalk Paint Bookcase Makeover and My New Swivel Seat
By Rebecca Sep 24 Feb 16
I bought this ugly bookcase at a flea market the day before my daughter was born. I had every intention of painting it. I’d already accumulated quite a few books as baby gifts, and it was just the right size. I didn’t want a new, overpriced bookshelf that was made in China of medium-density fiberboard…

Dollar Tree DIY Fall Decor Ideas
By Rebecca Sep 06 Apr 19
Yay! It’s September…for me that means Fall is officially here. While we may still get a few Indian summer days here and there, I’m giving myself the green light to jump into Fall decorating. Today, I’m going to share a round up of my 5 favorite Dollar Tree DIY Fall Decor Ideas to get you…

How to Make a Faux Grass Spring Decor Box
By Rebecca Feb 26 Apr 19
Hello there! Thanks for stopping by! Today I’m going to show you how to make a Faux Grass Spring Decor Box. Note: This post was originally published on March 25th, 2019 and updated on February 26, 2021. I’m happy to be participating in a Spring Blog Hop with some very talented bloggers. If you’re…

Patriotic Home Decor with a Vintage Style Tiered Tray
By Rebecca May 21 Apr 19
Celebrate the red, white and blue with a tiered tray filled with vintage and Dollar Tree items. It’s a fun, easy and budget friendly way to create unique patriotic home decor! The beginning of summer brings three patriotic holidays in a row…Memorial Day, Flag Day and the 4th of July. I designed a cute patriotic…


